

Quick Answer
Luminar on Mobile is Skylum’s photo-editing app for phones and Chromebooks. Its AI tools give you a quick starting point for lighting, color, portrait and landscape fixes, which you then fine-tune by hand. Start with a sharp photo, apply AI enhancement, adjust the details, compare with the original and export.
Key Takeaways
- Luminar on Mobile lets you edit photos on your phone without moving them to a computer first.
- AI enhancement handles common corrections such as lighting, color and detail as a starting point.
- Portrait and landscape edits look best when you keep natural texture and avoid maximum settings.
- A five-step workflow keeps edits fast and consistent: pick, enhance, fine-tune, compare, export.
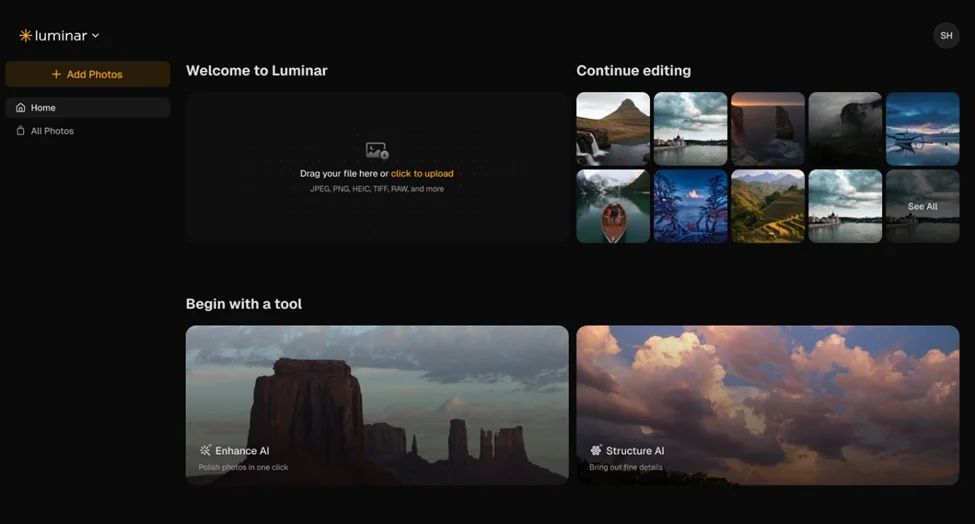
Great photos don’t always happen in perfect conditions. Maybe the lighting wasn’t quite right, the colors look different from what you remember, or your favorite travel shot needs a little extra work. That’s where photo editing comes in.
The good news is that you don’t need to spend hours adjusting every detail to get a photo looking its best. AI-powered editing tools can take care of many common corrections, from balancing light to bringing out colors and details. With Luminar on Mobile, you can make these adjustments right on your phone, without having to move your photos to a computer first.
Let’s look at how AI can make mobile photo editing easier and how to get the most out of it.
What is Luminar on Mobile?
Luminar on Mobile is a photo-editing app from Skylum, designed to bring powerful editing tools to your smartphone. Skylum lists it as a standalone app for iOS, Android and ChromeOS, offered as an Early Access version. It lets you work on your photos wherever you are, so there’s no need to wait until you’re back at your computer to give an image a finishing touch.
Traditional editing often involves adjusting exposure, contrast, saturation, sharpness and white balance one by one. There’s nothing wrong with that approach, but it can take time, especially when you’re working through a large collection of photos.
AI makes some of this work easier. Instead of figuring out every adjustment from scratch, you can use intelligent editing tools to get a starting point and then fine-tune the result to match your vision.
It’s a convenient option for beginners who are still learning their way around photo editing and for experienced photographers who want to spend less time on routine corrections. If you want to compare it with no-cost options first, see our roundup of free AI photo editors.
How does AI make photo editing faster?
AI can help with some of the most common challenges in photography. Here’s where it can make a difference.
1. Improve lighting and exposure
Ever taken a photo that looked great on your phone screen, only to find it too dark or washed out later? It happens, especially when shooting indoors, around sunset or in changing weather.
Lighting adjustments can help bring back details in shadows, tone down overly bright areas and make the whole image easier to look at. AI-powered enhancement can give you a useful starting point, so you don’t have to adjust every setting individually.
You can then make a few small tweaks to get the result just right. The aim isn’t to make everything brighter, but to bring out the details that matter.
2. Bring out natural colors
Sometimes a photo captures the moment perfectly but doesn’t quite reflect how it looked in real life. Cloudy skies can leave an image looking dull, while incorrect white balance can give it an unwanted blue or yellow tint.
Color adjustments help bring things back into balance. You can work with temperature, tint, saturation and vibrance to make colors look more natural or give an image a little more character.
A landscape might need richer greens and clearer blues, while a food photo could benefit from slightly warmer tones. Small changes can make a noticeable difference without making the image look overedited.
3. Refine portraits and facial details
Portraits are a little more personal. You want your subject to look their best, but you probably don’t want them to look like a completely different person.
AI-powered portrait editing can help refine facial details and improve the overall appearance of a photo. The trick is knowing when to stop. Too much smoothing or sharpening can quickly make skin look unnatural.
Keep some natural texture, pay attention to skin tones and avoid pushing every adjustment to its maximum. A good portrait edit should still look like the person you photographed.
4. Give landscape photos more depth
Landscapes often have a lot going on: a bright sky, distant mountains, trees, water and details in the foreground. Getting all these elements to work together can take a bit of editing.
Adjusting contrast, highlights, shadows and color can help bring out details that might otherwise get lost. You can also give the image more depth and make the different elements stand out without losing the natural feel of the scene.
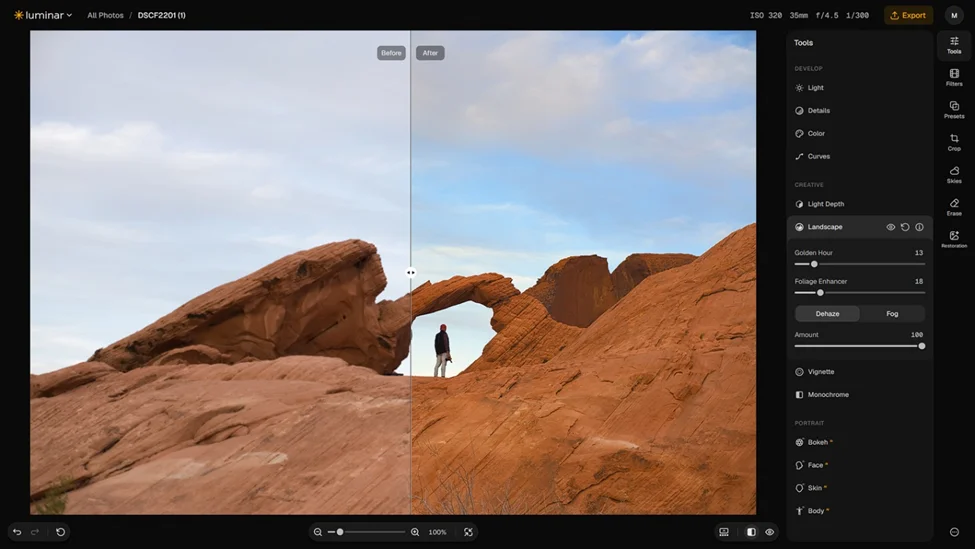
This is especially handy when editing travel photos on the go. Before saving your final version, take a look at the original alongside the edited image. You want to bring out what was already there, not make the landscape look like somewhere else entirely.
A simple workflow for better results
You don’t need a complicated editing routine to get good results. A few simple steps can help you work faster and keep your photos looking consistent.
- Pick the right photo. Start with an image that’s reasonably sharp and well composed. Editing can improve lighting and color, but it won’t always fix missed focus or heavy motion blur.
- Start with AI enhancement. Use the available AI tools to improve the overall look of your image. Think of this as your starting point, not necessarily the finished result.
- Fine-tune the details. Check exposure, contrast, colors and sharpness. Make adjustments where they’re needed rather than changing everything just because the controls are there.
- Compare it with the original. It’s easy to get carried away when editing. Take a step back, look at both versions and make sure the photo still feels natural.
- Export your photo. Choose the appropriate image quality and dimensions for where you plan to use it. If possible, keep the original file so you can try a different edit later.
Once you get into the habit of following these steps, editing becomes much less of a chore.
Who can benefit from Luminar on Mobile?
The short answer: anyone who likes taking photos and wants an easier way to edit them.
- Travelers can edit their favorite shots while they’re still on the trip, instead of waiting to get home and open their laptop.
- Social media creators can give their images a quick polish before posting, keeping their feed looking consistent.
- Everyday photographers can improve family photos, weekend snapshots and all those pictures that deserve more than a place in the camera roll.
- Small business owners can prepare product photos and promotional images on the go. Just remember to keep product colors and details accurate.
- Experienced photographers can use mobile editing for quick corrections and previews before moving on to more advanced desktop adjustments.
You don’t have to be a professional photographer to appreciate having useful editing tools close at hand.
Tips for getting more natural results
AI can save you time, but good editing still comes down to knowing what looks right. A few habits can help you avoid the overprocessed look:
- Don’t push every slider to the maximum. Stronger adjustments aren’t always better. Start small and build from there.
- Keep skin tones realistic. Pay attention to skin texture and natural color when editing portraits.
- Watch your highlights and shadows. Make sure bright areas don’t lose all their detail and dark areas don’t become muddy.
- Be careful with saturation and sharpening. Too much of either can make a photo look harsh.
- Think about where the photo will be used. An image for Instagram may need a different treatment from one you’re preparing for a large print.
- Check your export settings. Make sure the resolution and file format are suitable for your intended use.
And one more thing: don’t feel you have to fix everything. Sometimes the little imperfections are what make a photo feel real.
Conclusion
Photo editing doesn’t have to take up your whole afternoon. With AI-powered tools, you can handle common adjustments faster and spend more time on the creative side of photography.
Luminar on Mobile brings editing tools to your phone, making it easier to work on your photos wherever you happen to be. From correcting lighting and bringing out colors to refining portraits and landscapes, it gives you a convenient way to get more out of the images you take. For more advanced work on a tablet, our look at Affinity for iPad covers another option.
AI can do some of the heavy lifting, but your eye still makes the final call. Use the tools to save time, make adjustments that feel right and keep the photos looking like the moments you actually experienced.
FAQ
Is Luminar on Mobile available on iPhone and Android?
Yes. Skylum lists Luminar on Mobile as a standalone app for iOS, Android and ChromeOS. It is currently offered as an Early Access version.
Can AI editing fix any photo?
No. AI editing can improve lighting, color and detail, but it won’t always fix missed focus or heavy motion blur. Start with a reasonably sharp, well-composed photo for the best results.
How do you keep AI photo edits looking natural?
Start with small adjustments, keep natural skin texture in portraits, watch that highlights and shadows keep their detail, and compare the edit with the original before you export.