

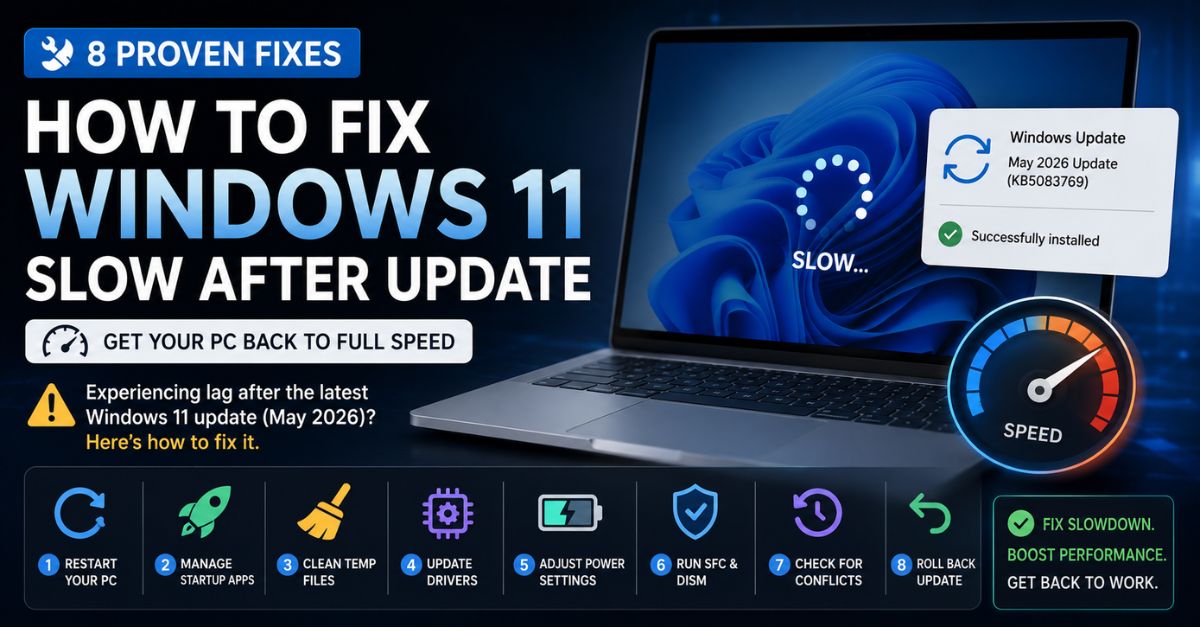
If Windows 11 is slow after an update, first wait 2–3 hours and do a full restart (not shut down), since background tasks like indexing and Defender scans run after updating. If it’s still sluggish, disable startup apps, clear temporary files, update your GPU drivers, set the power mode to Best performance, and run SFC/DISM to repair corrupted files.
- Do this first: Wait 2–3 hours, then restart (not shut down) to finish post-update tasks
- Most-skipped fix: Reinstall GPU drivers directly from Nvidia, AMD, or Intel
- Free up space: Clear temp files and “Previous Windows installation” (10–20 GB)
- Check power plan: Updates can reset it to Balanced, so switch to Best performance
- Repair or revert: Run DISM then SFC; roll back within the 10-day window if needed
You just installed the latest Windows 11 update, possibly the September 8, 2026 security update (KB5124008) or the September 22, 2026 optional preview (KB5124010), and now your PC feels like it’s running through mud. Applications take forever to open, the Start menu lags, and even switching between windows feels sluggish.
This is frustratingly common. Microsoft’s April 30, 2026 preview update (KB5083631) specifically addressed a Delivery Optimization memory problem and slow launching of startup apps, and the mandatory May 12, 2026 security update (KB5089549) delivered those same improvements to every supported Windows 11 24H2 and 25H2 PC. But if you’re reading this, the update clearly didn’t fix everything on your machine — or the update itself introduced new problems.
The good news is that most post-update slowdowns are fixable. Some resolve on their own within 24-48 hours, but if you don’t want to wait, these eight fixes will get your PC back to full speed.
Why Windows 11 Gets Slow After Updates
Understanding the root causes helps you apply the right fix instead of wasting time on random “optimization” tweaks.
Background processes are the most common culprit. After a major update, Windows runs file indexing, Windows Defender scans, SSD optimization, and .NET framework compilation in the background. These tasks consume significant CPU, RAM, and disk resources, and can take hours to complete — sometimes a full day on slower hardware.
Driver incompatibility happens when an update installs generic Microsoft drivers that replace your previously optimized ones. GPU drivers are the biggest offenders — a Windows update might swap your Nvidia or AMD driver for a generic Microsoft one, tanking graphics performance.
Storage pressure occurs because updates download and extract large temporary files. The “Previous Windows installation” rollback data alone can consume 10-20 GB. If your system drive was already near capacity, the added files push you into the danger zone where Windows starts struggling.
The Delivery Optimization memory leak has been a known issue that Microsoft addressed in the April 30, 2026 preview update (KB5083631), with the fix reaching all PCs through the May 12, 2026 security update. This background service (responsible for downloading updates via peer-to-peer sharing) was consuming unexpectedly large amounts of RAM on many systems.
Fix 1: Wait 2-3 Hours, Then Restart
This sounds dismissive, but it’s genuinely the correct first step. After a major update, Windows runs intensive optimization tasks in the background: re-indexing files for search, running Defender’s post-update full scan, optimizing your SSD, and recompiling .NET assemblies.
Open Task Manager (Ctrl+Shift+Esc) and check the “Processes” tab. If you see “Windows Modules Installer Worker,” “SearchIndexer.exe,” or “Antimalware Service Executable” consuming high CPU or disk usage, that’s Windows finishing its post-update housekeeping. These processes will finish on their own.
Give your PC at least 2-3 hours of being powered on and idle (not in sleep mode). Then do a proper restart — see Fix 2 — and check if performance has improved.
Fix 2: Restart Your PC (Not Shut Down)
This distinction genuinely matters. When you click “Shut down” in Windows 11, your PC enters a hybrid shutdown state that preserves the kernel session for faster boot times (this is called Fast Startup). A proper restart fully clears and reloads everything, including completing pending update installation steps.
Click Start → Power → Restart (not “Shut down”). After the restart, many post-update issues resolve because Windows completes deferred configuration changes and clears stuck processes.
Fix 3: Disable Unnecessary Startup Programs
Windows updates occasionally re-enable startup programs you previously disabled. Microsoft confirmed that the May 2026 update includes improvements to startup app launch performance, but the improvement only helps if you haven’t let dozens of unnecessary programs pile up.
Press Ctrl+Shift+Esc to open Task Manager, click the “Startup apps” tab on the left sidebar, and sort by “Startup impact.” Right-click any app with “High” impact that you don’t need at startup and select “Disable.”
If your system still feels sluggish after trimming startup apps, you may also need to clear RAM on Windows 11 by closing memory-heavy background processes, restarting the PC properly, and checking Task Manager for apps consuming excessive memory.
Common safe-to-disable programs include: OneDrive (if you don’t use it), Microsoft Teams, Spotify, Discord, and manufacturer bloatware like HP Support Assistant, Dell SupportAssist, or Lenovo Vantage. Don’t disable your antivirus, audio manager, or GPU control panel.
Fix 4: Clear Temporary Files and Update Leftovers
Windows updates leave behind gigabytes of temporary installation files. Clearing them frees disk space and can noticeably improve file operation speeds.
Open Settings (Win+I) → System → Storage → Temporary files. Windows will scan and show you how much space each category uses. Check: “Windows Update Cleanup,” “Temporary files,” “Delivery Optimization Files,” and “Previous Windows installation(s).”
The “Previous Windows installation(s)” option can free 10-20 GB by removing the rollback data Windows keeps in case you need to revert. Once you’re confident the update is stable (give it a week), removing this is safe and reclaims significant storage.
You can also run Disk Cleanup as administrator for a more thorough clean. Press Win+S, type “Disk Cleanup,” right-click it and select “Run as administrator.” This unlocks additional cleanup options not available in the standard Storage settings.
Fix 5: Update Your Drivers (Especially GPU)
This is the fix most people skip that makes the biggest difference. A Windows update can install generic Microsoft drivers that replace your previously optimized vendor-specific ones, especially for graphics cards.
For GPU drivers, go directly to the manufacturer: nvidia.com/drivers for Nvidia, amd.com/drivers for AMD, or intel.com/drivers for Intel integrated graphics. Download the latest driver for your specific model. Don’t rely on Windows Update for GPU drivers — it almost always installs an older or generic version.
For other problematic drivers, open Device Manager (right-click Start → Device Manager). Look for any device with a yellow warning triangle — that indicates a driver issue. Right-click the device and select “Update driver.” This is also the right place to troubleshoot Bluetooth issues after update, since Windows updates can replace or disrupt Bluetooth adapter drivers just like GPU, chipset, or network drivers.
Also check your motherboard manufacturer’s support page for chipset and network adapter driver updates. These don’t show warnings in Device Manager but can still affect system performance after a Windows update.
While you’re updating system software, it’s also worth checking that your Office 365 installation is current — Microsoft recently patched a bug where the Office suite was exposing data to Copilot AI, and the fix may require a separate update from the Windows one.
Fix 6: Adjust Power Settings
Some Windows updates reset your power settings to “Balanced” even if you previously chose a faster option. This throttles your CPU to save energy, which directly impacts performance.
Open Settings → System → Power & battery and set Power mode to “Best performance.” Microsoft’s power mode guide lists 3 modes: Best power efficiency, Balanced, and Best performance. This prioritizes speed over battery life, and on desktop PCs there is no battery to conserve. If you can’t change the power mode, a custom power plan is probably selected: open Control Panel → System and Security → Power Options, select “Balanced,” and then set the power mode in Settings again.
Laptops have one more update-related cause. The September 22, 2026 optional preview update (KB5124010) improves display and performance in certain cases where a plugged-in laptop incorrectly detects a switch from AC power to battery power. Microsoft is rolling that change out gradually, so install it from Settings → Windows Update → Advanced options → Optional updates if your plugged-in laptop still acts as if it were on battery.
Fix 7: Run System File Checker (SFC) and DISM
If the update corrupted system files, your PC may behave erratically or slowly regardless of other optimizations. Windows includes built-in repair tools for this.
Open Command Prompt as administrator (press Win+S, type “cmd,” right-click “Command Prompt,” select “Run as administrator”). Run these commands in order:
First: DISM /Online /Cleanup-Image /RestoreHealth — this scans your system image and repairs any corruption using Windows Update as a source. Wait for it to complete (can take 10-15 minutes).
Then: sfc /scannow — this scans all protected system files and replaces corrupted ones with cached clean copies. If it finds and repairs files, restart your PC and check if performance improved.
These tools are the most effective way to fix corruption caused by interrupted or partially failed updates.
Fix 8: Roll Back the Update
If nothing above resolves the issue after 48 hours, rolling back to the previous version may be necessary.
For cumulative updates: Go to Settings → Windows Update → Update history → Uninstall updates. Find the most recent update (look for the KB number in the title), click it, and select “Uninstall.”
For major feature updates: Go to Settings → System → Recovery → “Go back” (under “Previous version of Windows”). You have a 10-day window for this. After 10 days, the rollback files are automatically deleted.
Note that rolling back is a temporary measure. The update you’re reverting will likely be offered again, potentially with fixes for the performance issues you experienced. Keep an eye on Microsoft’s release notes and community forums for acknowledged issues and patches. And if your update is stuck before it even finishes installing, handle that separately before trying rollback or cleanup steps.
Preventing Slowdowns From Future Updates
Set your active hours in Settings → Windows Update → Advanced options so updates don’t install during work hours. Keep at least 20% of your system drive free at all times. Before major feature updates, create a system restore point via System Properties → System Protection → Create. Consider pausing updates for a week after release using “Pause for 1 week” in Windows Update settings — this lets early adopters discover issues first.
Keeping your system protected with proper cybersecurity and data privacy practices also helps prevent malware-related slowdowns that can masquerade as update issues.
FAQ
1. Is it normal for Windows 11 to be slow after an update?
Yes, temporary slowness for the first few hours is expected. Windows runs background optimization tasks (indexing, Defender scans, SSD optimization) that consume system resources. Microsoft’s May 2026 update specifically improved startup app launch speeds and fixed Delivery Optimization memory leaks, but the background processes still need time to complete on each machine.
2. Can a Windows 11 update permanently slow down my PC?
In rare cases, yes — particularly if the update introduces a driver incompatibility or if your hardware barely meets Windows 11’s minimum requirements. Rolling back the update is always an option within the first 10 days. If your PC is consistently slow regardless of updates, the issue might be hardware — an HDD instead of SSD, insufficient RAM, or thermal throttling.
3. Should I turn off Windows 11 automatic updates?
We don’t recommend disabling updates entirely because they include critical security patches — the same updates that protect against vulnerabilities like the recent Microsoft Office Copilot bug. Staying current also matters for deeper system-level changes, including the Secure Boot certificate deadline in 2026, which could affect update planning on older or unmanaged PCs. Instead, use “Pause updates” to delay them by a week or two while early issues get identified and patched.
4. How much free disk space does Windows 11 need?
Microsoft requires at least 64 GB total, but for smooth performance you should keep 15-20 GB free on your system drive at all times. After a major update, temporary files can consume an additional 10-20 GB until you clean them up using Fix 4 above.
5. What’s the best way to check what’s actually slowing my PC?
Open Task Manager (Ctrl+Shift+Esc) and check the “Processes” tab. Sort by CPU, then Memory, then Disk usage to find which process is consuming the most resources. If “System” or “Windows Modules Installer Worker” shows high disk usage, that’s normal post-update behavior that resolves within hours. If a third-party app is hogging resources, update or uninstall it.